Plugins
Plugins you can use without any custom coding on your own website. They will allow you to add more advanced e-commerce features. For instance, one simple plugin lets you start a full-fledged business.
Download the plugins
Magento
Magento plugins for the Checkout
Prestashop
Prestashop plugins.
WooCommerce
WooCommerce plugin with redirect, iframe and hosted payment fields modes.
Install WooCommerce
Installation
To install a Plugin:
- Go to Plugins.
- Click Add Plugin.
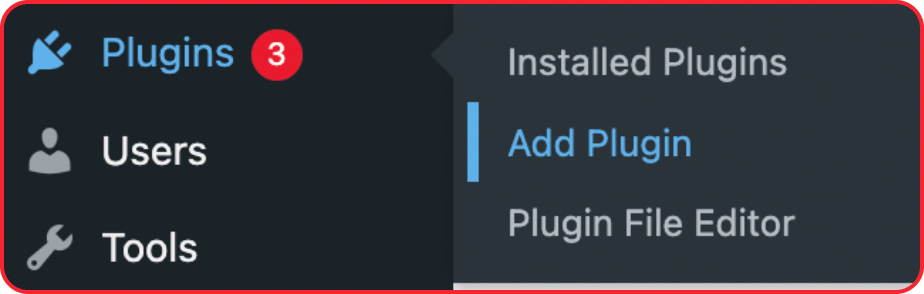
- Click Upload Plugin.

- Select the plugin file and click Install Now.
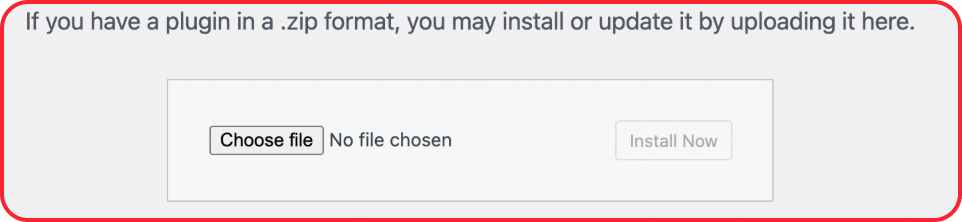
- Click 'Activate'.
To update from an earlier version, upload the new file the same way and click Replace current with uploaded. Your settings are kept.
WooCommerce configuration
To configure WooCommerce:
Open your session in WooCommerce
- Go to WooCommerce → Settings
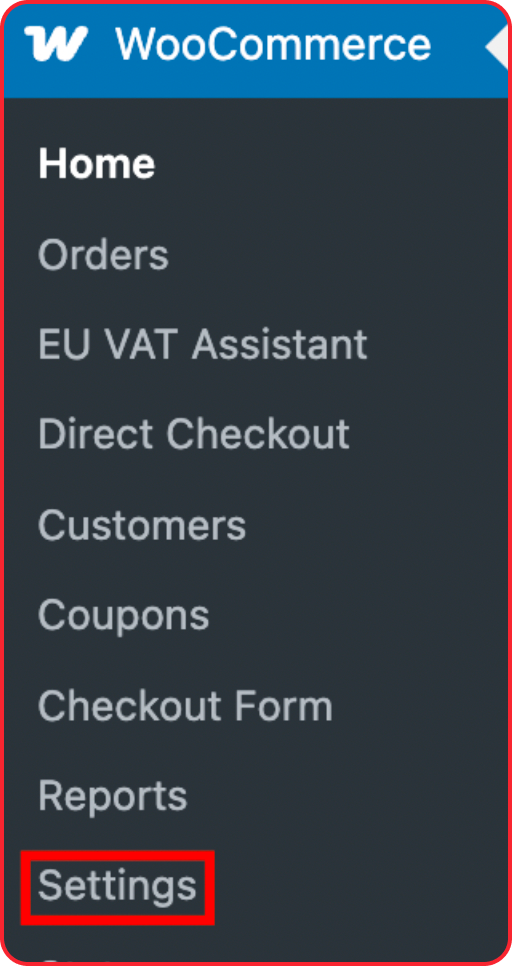
- Open the Payments tab
- Find WPG Commerce
- Click 'Manage'.
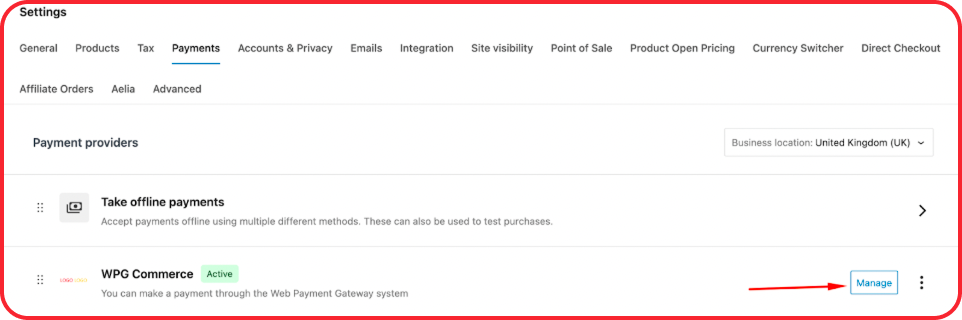
Start the configuration
Fill in the fields as described below:
- Enable WPG Commerce
Enable the payment method. If disabled, the method will not appear at checkout.
- Title
This is the name displayed to customers at checkout. Example: Credit Card / Secure Payment

- Front description
Text shown to customers under the payment method on the block checkout.
- Description
Description of the payment method shown in WooCommerce → Settings → Payments.
- Checkout Host
Enter the payment gateway checkout URL.
Example: http://pay.your-domain.com
Enter the host only, without /api/v1/session. In hosted payment fields mode, the plugin also loads the card fields script from this host.

infoThis is your white-label checkout domain provided by your payment provider.
- Payment Method
Leave this field empty. Do NOT select:
- Card
- Google Pay
- PayPal
warningPayment methods are dynamically provided by the gateway. Selecting values here may override gateway configuration
- Additional payment parameters (optional)
Adds extra parameters to the payment request. Used in redirect and iframe modes only.
- Card(Order info): sends order items, shipping and billing details.
- Cryptocurrency (mandatory): adds a required cryptocurrency selector to the checkout page and sends the selected value as
cryptoCurrency.
- Choose cryptocurrencies
Cryptocurrencies the customer can choose from when Cryptocurrency (mandatory) is selected:
- BTC
- ETH
- USDT ERC-20
- USDC ERC-20
- USDT Polygon
- USDC Polygon
- USDT TRC-20
- Merchant Key
Enter the Merchant (Test) Key provided by your payment provider.
- Merchant Password
Enter your Merchant Password. Used internally to generate a secure hash for payment requests.
- VAT Calculation (optional)
Enable it if you want VAT to be calculated by the payment system. Behaviour:
- VAT is calculated based on the public payer IP
- WooCommerce tax settings may be overridden
- The plugin sends the order total without the tax calculated by WooCommerce
- Iframe Payment (optional)
Shows the payment page in an iframe on the order page after checkout. Not used when Hosted fields payment is enabled.
infoThe payment page is still hosted by the gateway Some payment providers may not support iframe 3DS may open outside the iframe
- Hosted fields payment (optional)
Shows card fields directly on your checkout page instead of redirecting the customer to the payment page. See Hosted payment fields mode.

- Url target (for iframe only)
Name or keyword of the browsing context where the customer should be returned according to the HTML specification. Sent only when Iframe Payment is enabled. Possible values:
- Not used
- Self (
_self) - Blank (
_blank) - Parent (
_parent) - Top (
_top)
Find the result of applying the values in the HTML standard description (Browsing context names)
- Display Hook (for iframe only)
Defines where the iframe is displayed. Available options:
- woocommerce_thankyou
- woocommerce_order_details_after_customer_details
- Form ID (optional)
Used for custom payment page design:
- If an ID number is provided, a custom form (previously created by the payment provider - not in scope of this plugin) will be displayed.
- If empty, the default checkout page will be used
Not used in hosted payment fields mode.
- Order Status
Select the status to be applied after successful payment. Options:
- Completed
- Processing
- Enable Debug
Enable logging for troubleshooting. This is a text field: enter yes to enable logging. Logs are in WooCommerce → Status → Logs, source wpgLog.
- Hide icon on front
Hides the payment method logo at checkout.
- Logo (optional)
Custom logo displayed for the payment method at checkout.
- Callback URL
The Callback URL is generated automatically by the plugin and shown below the settings.
Example: https://yourstore.com/wp-json/wpgfull/v1/callback
Copy this URL and send it to your payment provider, or set it up in merchant settings if you have access:
Make sure to submit changes.
noteThe old Callback URL
https://yourstore.com/?wc-api=wc_web_payment_gatewaystill receives callbacks, but WordPress shows a notice until you replace it with the new URL in merchant settings.
WooCommerce Payment Flow
- The customer places an order in WooCommerce.
- The customer is redirected (or shown an iframe) to the payment page, or enters card details on your checkout page in hosted payment fields mode.
- Payment is processed on the gateway side.
- Gateway sends a callback to WooCommerce.
- The plugin updates the order status automatically.
warningStatus updates are handled via callback only No manual status polling is used
Hosted payment fields mode
With Hosted fields payment enabled, the customer enters card details on your checkout page. The card fields are hosted by the payment platform, so card data does not pass through your store. It works on both the classic and the block checkout.
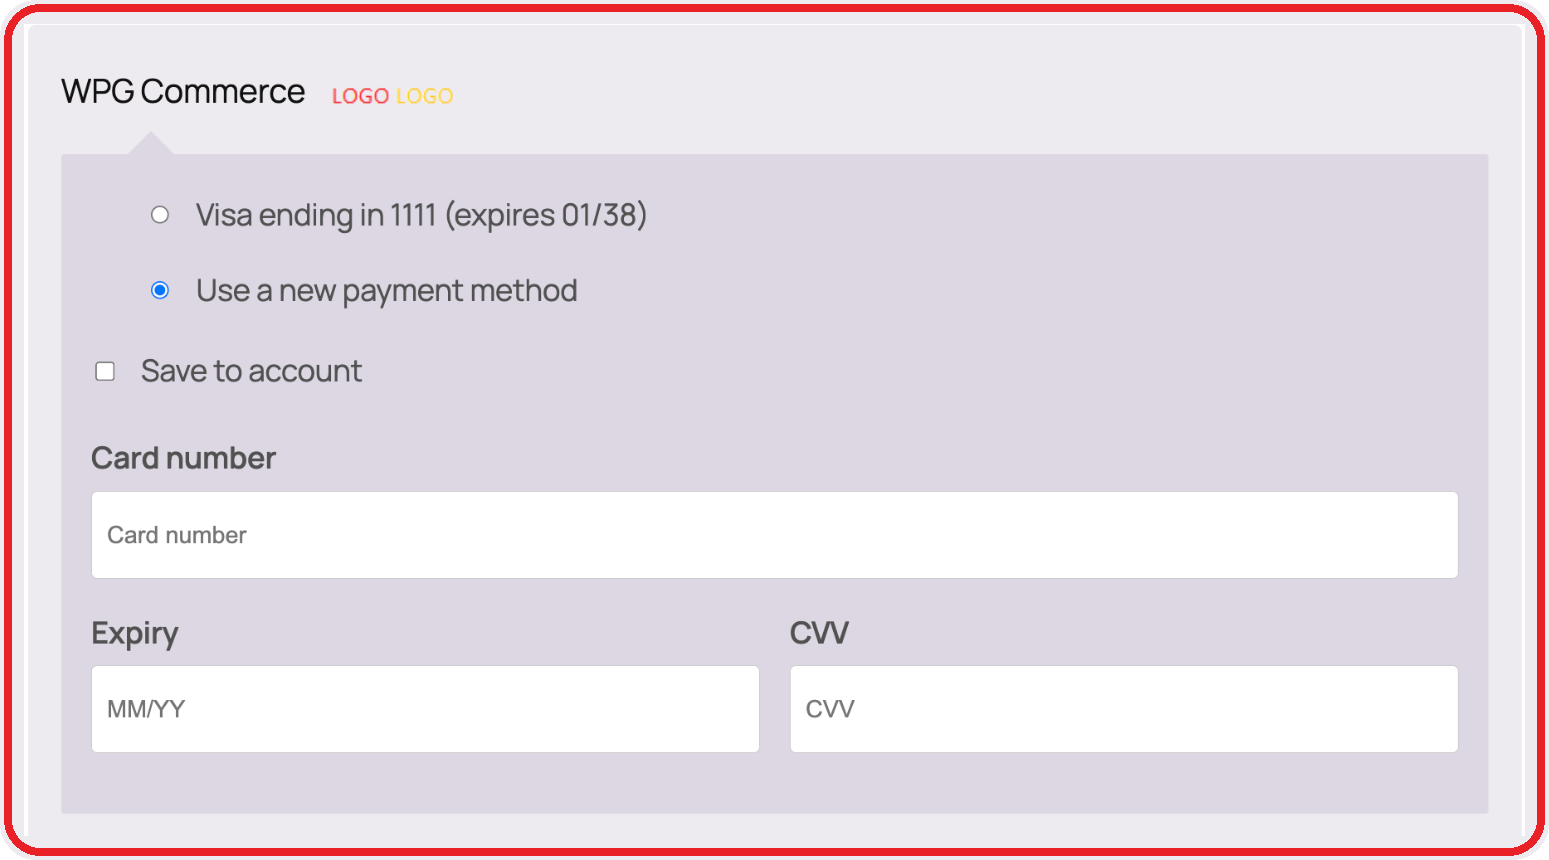
- The card fields appear after the customer fills in first name, last name and email.
- The customer enters card number, expiry date and CVV and places the order.
- If 3-D Secure is required, the customer is redirected to complete it and then returned to the order page.
- The order stays Pending payment until the callback arrives.
If the customer pays with a saved card, the plugin uses the redirect or iframe flow with the saved card.
Not used in this mode: Iframe Payment, Url target, Display Hook, Form ID, Additional payment parameters.
info
- The plugin does not send the customer's IP address in this mode, so the platform records your store server IP as the payer IP.
- The customer name is sent in Latin letters only. If no Latin letters are left, the plugin uses the part of the email before
@orGuest User.- The order number on the platform is a reference like
wpg-<id>, not the WooCommerce order number. To find the payment, use the transaction ID saved in the WooCommerce order.
Saved cards and subscriptions
Saved cards are available on the classic checkout. Edit the Checkout page and add the Classic Checkout block instead of or next to the default block. The customer can then select Save to account at checkout, and next time choose the saved card or a new one.
Subscriptions require the WooCommerce Subscriptions extension (paid, from WooCommerce.com). Other subscription plugins are not supported.
- Install and activate WooCommerce Subscriptions.
- Go to WooCommerce → Settings → Subscriptions and enable Subscription product creation.
- Create a subscription product.
- Use the classic checkout for subscription products. On the block checkout, WPG Commerce is not shown when the cart contains a subscription.
Subscriptions work in redirect, iframe and hosted payment fields modes. The first payment saves the card. Renewals are charged automatically with the saved card, with no action from the customer.
info
- The first subscription order is always set to Completed. Order Status does not apply to it.
- Renewal orders get the status WooCommerce sets for a paid order.
- VAT Calculation is not applied to renewal payments.